Avatar & Name
Jane’s profile picture (avatar) appears on the left, and her name Jane Doe is shown as a heading. If you set Link: Posts Archive for the name, clicking “Jane Doe” takes readers to all posts by Jane.
Esta página aún no está disponible en tu idioma.
The Author Box widget showcases author information for a post in an attractive box layout. It typically appears at the end of blog posts or in author archive pages, providing readers with details about the post’s author. This widget can display the author’s profile picture (avatar), name, biography, and an optional link to the author’s posts or website.
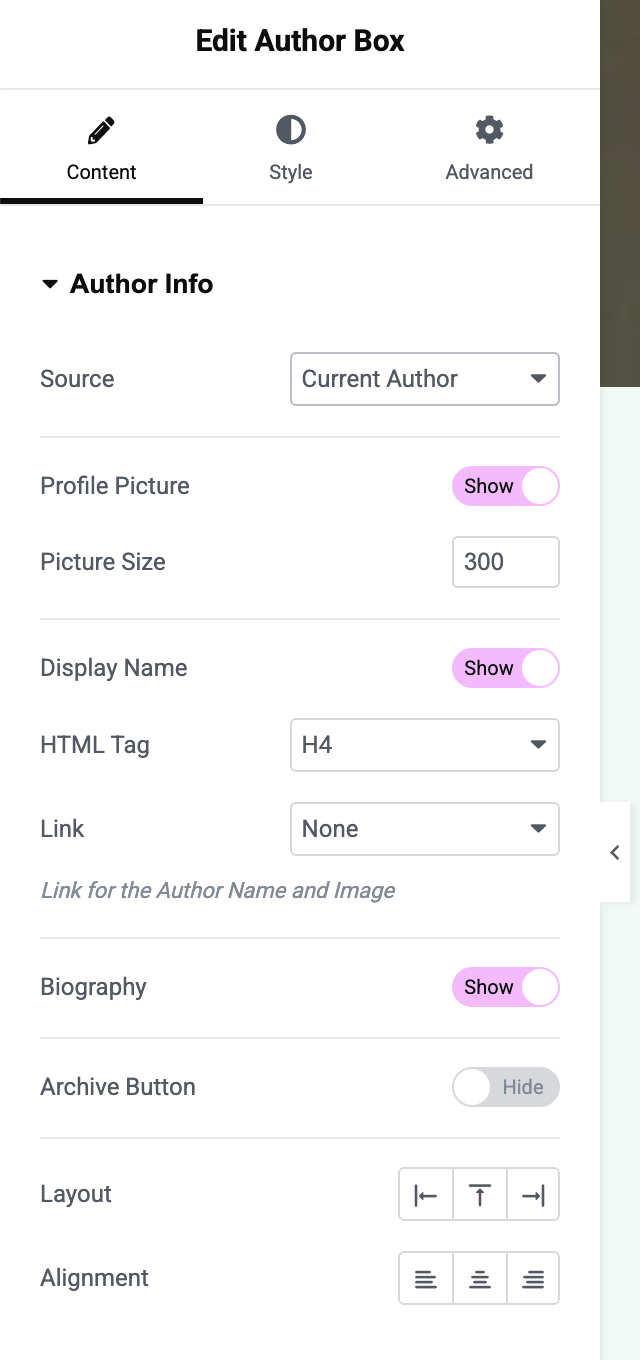
When the Author Box is selected, you have a variety of options in the Content tab to configure what information to show and where it comes from:
Source: Choose Current Author (default) to dynamically use the author of the current post, or Custom to enter author details manually. Using Current Author is ideal for post templates - it will automatically show each post’s actual author. The Custom option is useful if you want to showcase a specific person (e.g., for a static page or if the post author info is unavailable).
Profile Picture (Avatar): Toggle Show Avatar on or off. When enabled (default “Yes” for current author), the author’s profile picture will display. For Current Author, it uses the author’s WordPress avatar (typically from Gravatar). You can set the Picture Size (in pixels) to control how large the avatar appears. If using Custom source, you can upload an image under Profile Picture (this field appears only when Custom is selected).
Name: Toggle Display Name on or off. When enabled, the author’s name will be shown. For Custom source, an input for Name appears, allowing you to set a custom name (default placeholder “John Doe”). You can also choose the HTML Tag for the name (h1-h6, div, span) - by default it’s an <h4> for a nice subheading size, but you can change it depending on your design hierarchy.
Link: Control what happens when users click on the author’s name or avatar. For Current Author source, the Link dropdown offers:
If you choose Website or Posts Archive, then on the live site the author’s name and picture will be clickable, taking visitors to the respective URL. For Custom source, you can provide any URL in the Author Website field to link the name and avatar (for example, link to an external profile or custom page).
Biography: Toggle Biography on or off. When enabled, the author’s biographical info is displayed. For Current Author, this pulls from the author’s Biographical Info in their WordPress profile. For Custom, a Bio text area will appear for you to enter any text or HTML for the author description. Use this to give a short introduction or credentials for the author.
Archive Button: Toggle Archive Button on or off. This option (for Current Author) adds a call-to-action button linking to the author’s posts archive. When enabled, a button (often labeled “All Posts” by default) will show, which viewers can click to see all posts by that author. For Custom source, you can provide a specific URL in Posts URL (perhaps linking to a category or an external page) and customize the Archive Text (the button label, default “All Posts”).
Layout: Choose the layout of the author box. Options are Left, Above, Right, indicating the position of the avatar relative to the text:
Selecting a layout adds a prefix class (like afeb-author-box-layout-image-left) which arranges the content accordingly.
Alignment: Set the overall alignment of the content within the Author Box container (Left, Center, Right). For instance, you might center-align an above-layout author box, or left-align one with the avatar on left.
Switch to the Style tab to fine-tune the appearance of the Author Box. You’ll find sections for Image, Content, Name, Biography, and Button styling (the exact sections may depend on which elements are enabled):
Imagine you have a blog post written by Jane Doe. At the bottom of the post, you insert the Author Box widget. With Source = Current Author, the widget will automatically display Jane’s information:
Avatar & Name
Jane’s profile picture (avatar) appears on the left, and her name Jane Doe is shown as a heading. If you set Link: Posts Archive for the name, clicking “Jane Doe” takes readers to all posts by Jane.
Bio
Below the name, a short bio like “Jane Doe is a travel blogger who has visited 30+ countries…” is displayed. This text comes from Jane’s WordPress user profile bio.
Archive Button
If enabled, a button labeled “All Posts” follows the bio. Clicking it goes to Jane’s author archive page where all her blog posts are listed.
In this example, the Author Box creates a personalized touch on the post, with everything updating dynamically if a different author writes another post.