Vertex Addons Custom CSS/JS Documentation
Esta página aún no está disponible en tu idioma.
The Custom CSS/JS extension allows you to inject your own CSS styles and JavaScript code directly from Elementor’s editor. This is useful when you need to apply unique styling or add custom scripts to your pages without editing theme files or installing extra plugins. Whether it’s a small CSS tweak for a single widget or a site-wide script, Custom CSS/JS makes it easy to extend your design and functionality right inside Elementor.
How to Use Custom CSS/JS
Section titled “How to Use Custom CSS/JS”-
Enable the Extension: By default, Custom CSS/JS is active. If it was turned off, go to your WordPress dashboard, navigate to Vertex Addons > Extensions, and make sure Custom CSS/JS is switched on.
-
Add Custom CSS to an Element: In Elementor, select the widget or section you want to style. Go to the Advanced tab of that element. Scroll down and find the Custom CSS panel (added by Vertex Addons). Toggle it open and you’ll see a code editor field. Enter your CSS code here.
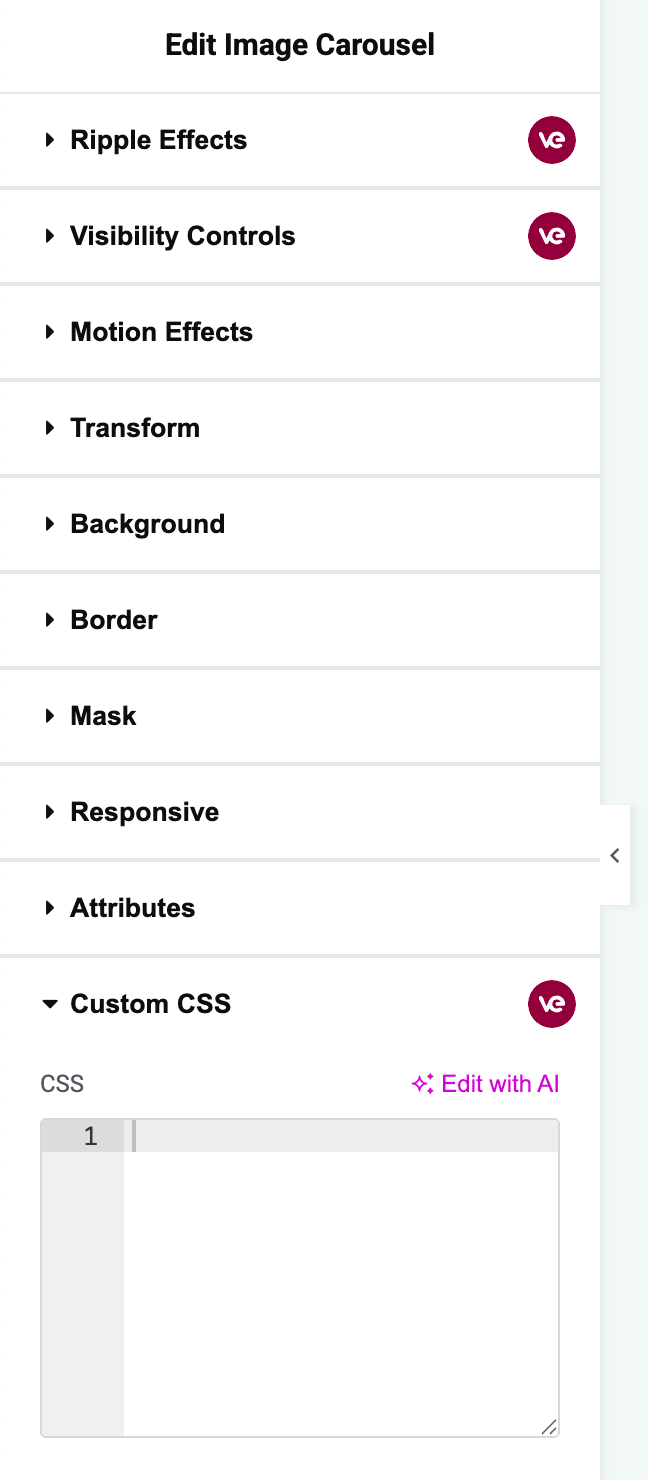 In this image, the Custom CSS field is highlighted in the Advanced tab for a selected widget. You can type your CSS and use “selector” to target that specific element.
- When writing CSS, you can use the special keyword
selectorto target the element you’re editing. For example,selector { background-color: red; }will apply a red background to that widget or section only. You can add any CSS rules here, and they will be scoped to this element on the page. - As soon as you apply the CSS and update the page, the changes will reflect on your live site. (In the Elementor preview, the styling should also apply immediately so you can see the effect.)
- When writing CSS, you can use the special keyword
-
Add Custom CSS/JS to the Entire Page: You can also add code that applies to the entire page (or site) via Elementor’s Page Settings.
- In the Elementor editor, click the Settings icon (the gear symbol at the bottom left panel) to open Page Settings.
- Navigate to the Advanced tab in Page Settings. You will find a section labeled Custom CSS/JS (added by Vertex Addons). Inside this, there are two tabs: CSS and JS.
- CSS Tab: Paste any CSS styles here that you want to affect the whole page. This is great for page-wide tweaks. Like with element-specific CSS, you can use
selectorin this context to refer to the entire page container if needed. - JS Tab: Here you have two fields for JavaScript:
- Header JS: Code placed here will run in the page header (immediately when the page loads, before the content is fully loaded).
- Footer JS: Code placed here will run in the page footer (after the page content is loaded, just before the closing
</body>tag).
- Use these fields to add custom scripts, such as third-party integrations or small interactive scripts, without editing theme files. For example, you could paste a chat widget script or a Google Analytics snippet into the Footer JS.
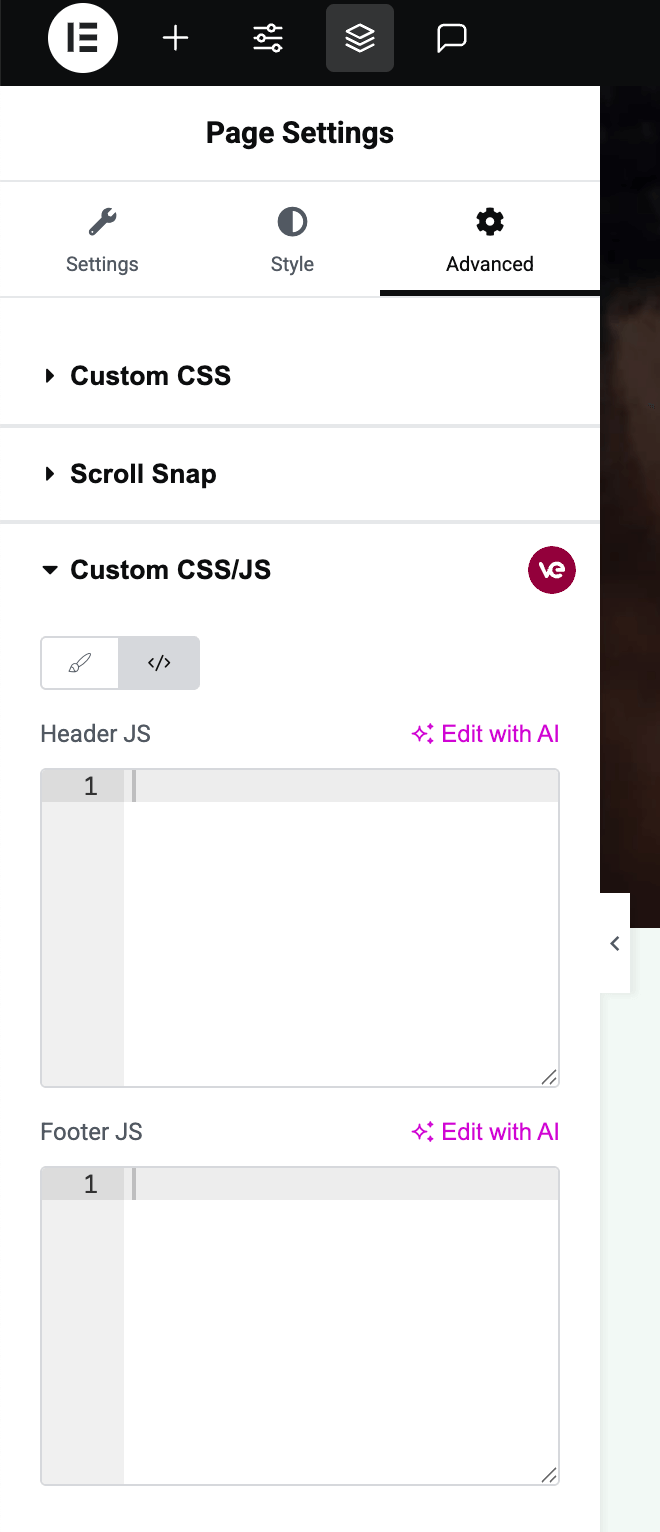 Here, the Page Settings Advanced tab is open, showing the Custom CSS/JS section with separate fields for adding global CSS, Header JS, and Footer JS code.
 -
Save and Test: After adding your CSS and/or JS, click Update to save the page. View the page on the frontend to ensure your custom code works as expected. CSS changes will alter the styling as you defined, and any JavaScript in Header or Footer will execute on page load.
Using Custom CSS/JS, you have the freedom to fine-tune your Elementor designs and add functionality, all without leaving the Elementor interface or writing code in external files. It’s a powerful way to get exactly the look or behavior you need in specific cases.